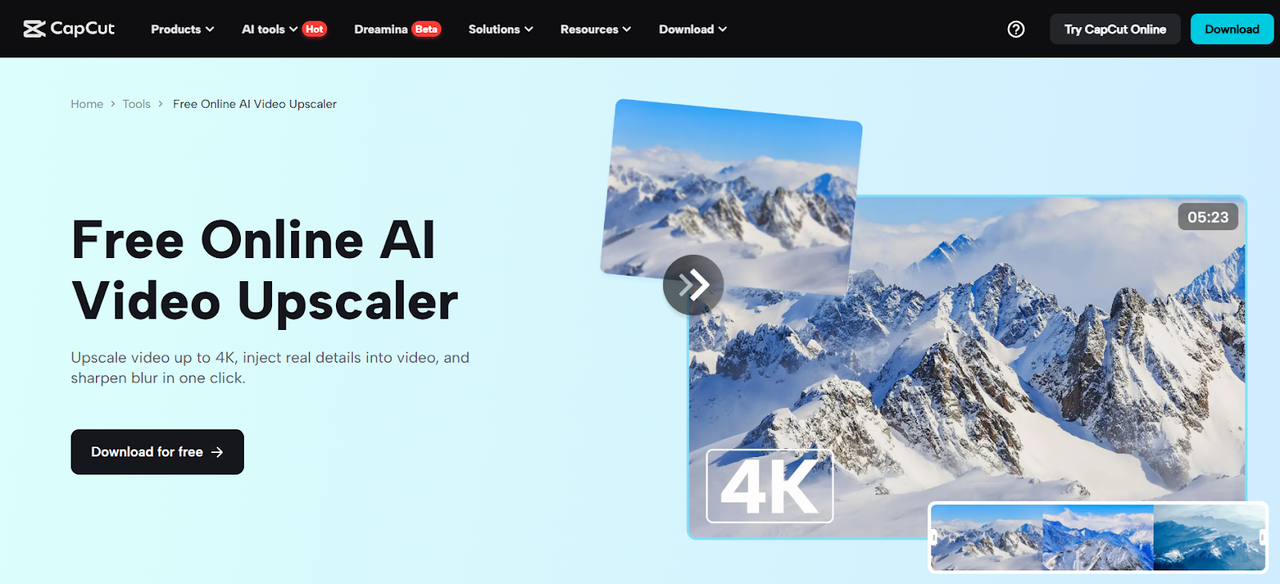
Turn Old Clips into HD: Using CapCut PC’s AI Video Upscaler Step-by-Step
When you are in the middle of a pile of old low-resolution clips, which can be in an old phone, an old camera, or even some screen recordings, and you are thinking of getting rid of them, hold on.
The video editing tools that CapCut offers help content creators create their videos using AI technology that can require just a starting-level editor to transform pixelated and blurred video into sharp and HD content.
AI video upscaler built into CapCut Desktop can assist users in remastering video quality with only a several actions, which is great when you want to upload a video to the YouTube platform or create a short social content video, or want to save great moments.
In the case of self-media creators, this not only retains the important content but also contributes to the cost-effective scaling of production to ensure high-quality visuals become more available than ever before.
The guide will help you learn how to upscale your footage on CapCut step by step, as well as provide a sneak peek at such related functions as the AI voice generator and text-to-speech AI to complete your material even more.
Why Use CapCut’s AI Video Upscaler?
Before jumping into the how-to, let’s understand the “why”. Low resolutions appear pixelized, uninformative, and cannot capture the attention of the viewer, particularly in current high definition displays. It is not only upscaling your video, but AI is scanning them, and wisely increases the clarity and details to make your content platform appropriate, like TV, YouTube, Instagram, and LinkedIn.
This not only makes AI features in CapCut useful but also necessary for creators seeking to enhance the production value of the existing library of videos.
Step-by-Step: How to Use CapCut’s AI Video Upscaler
Let’s explore how to rescue low-quality footage using CapCut’s built-in Enhance image feature:
Step 1: Import Your Low-Resolution Clip
Open CapCut Desktop and press “New project”. Use the drag and drop option to drag and drop your old or blurred video into the media library and also into the timeline. It will become your working clip.
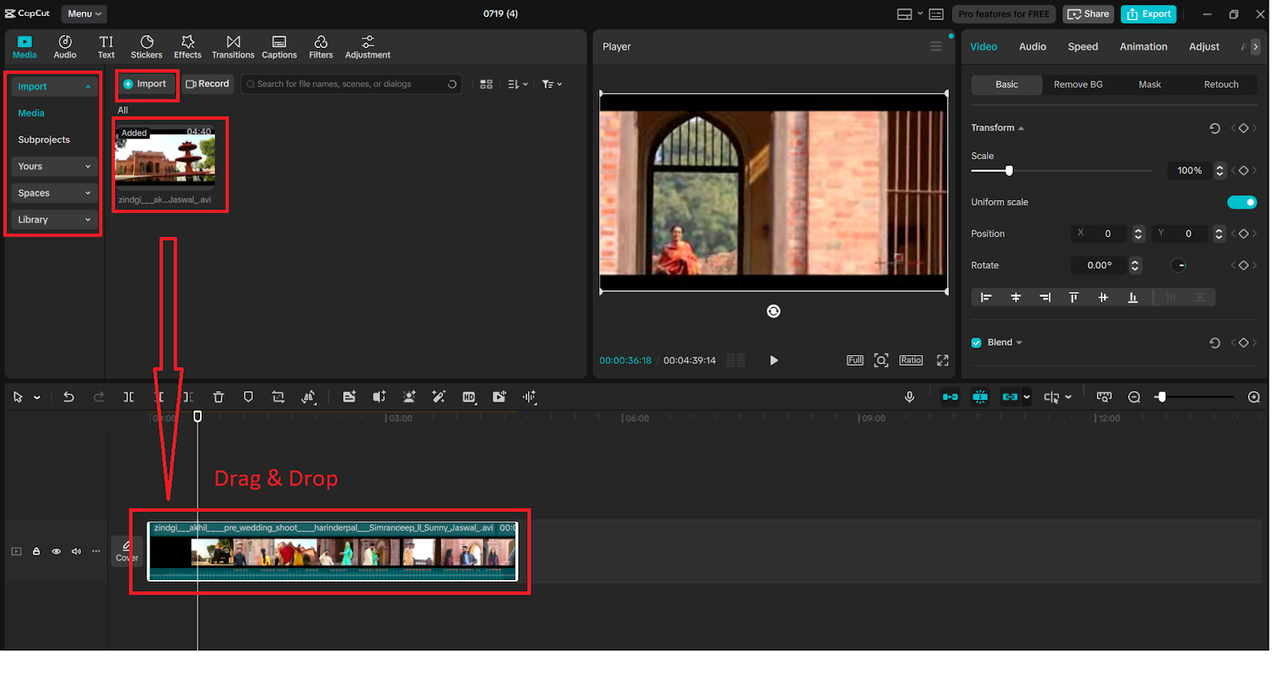
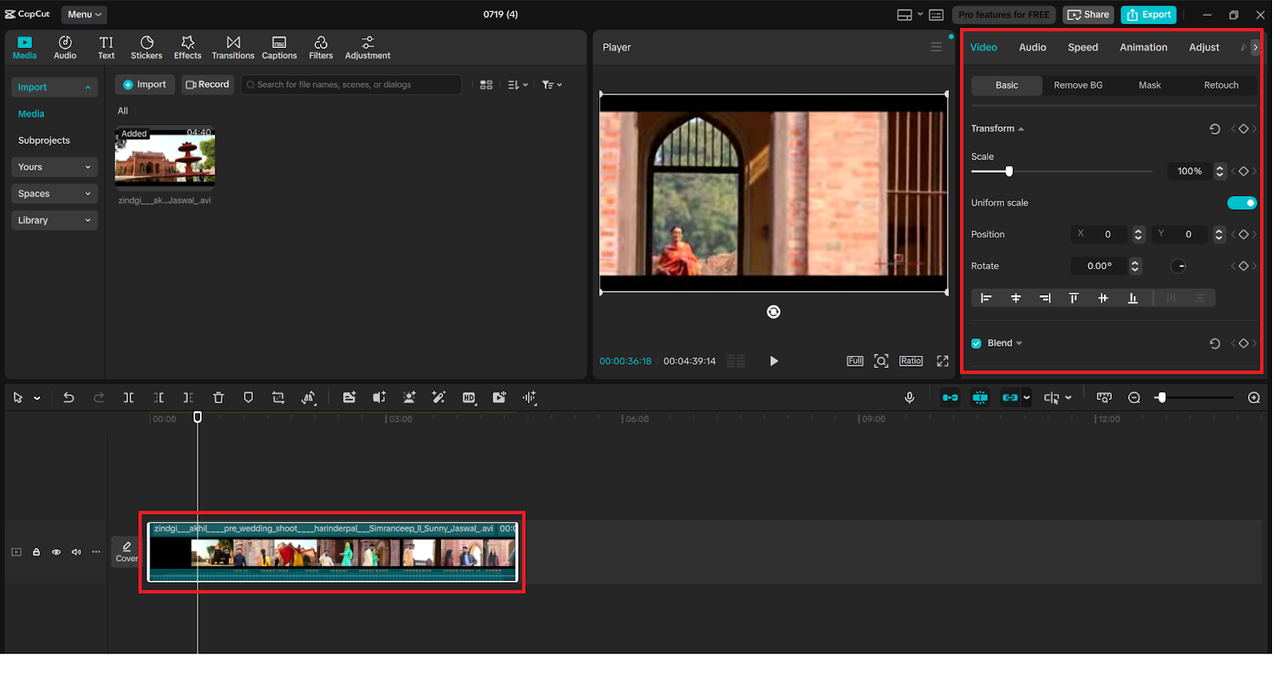
Step 2: Select the Clip on the Timeline
Click on your clip in the timeline to activate the editing panel. On the right-hand side, a range of options will appear—this is where the enhancement process begins.
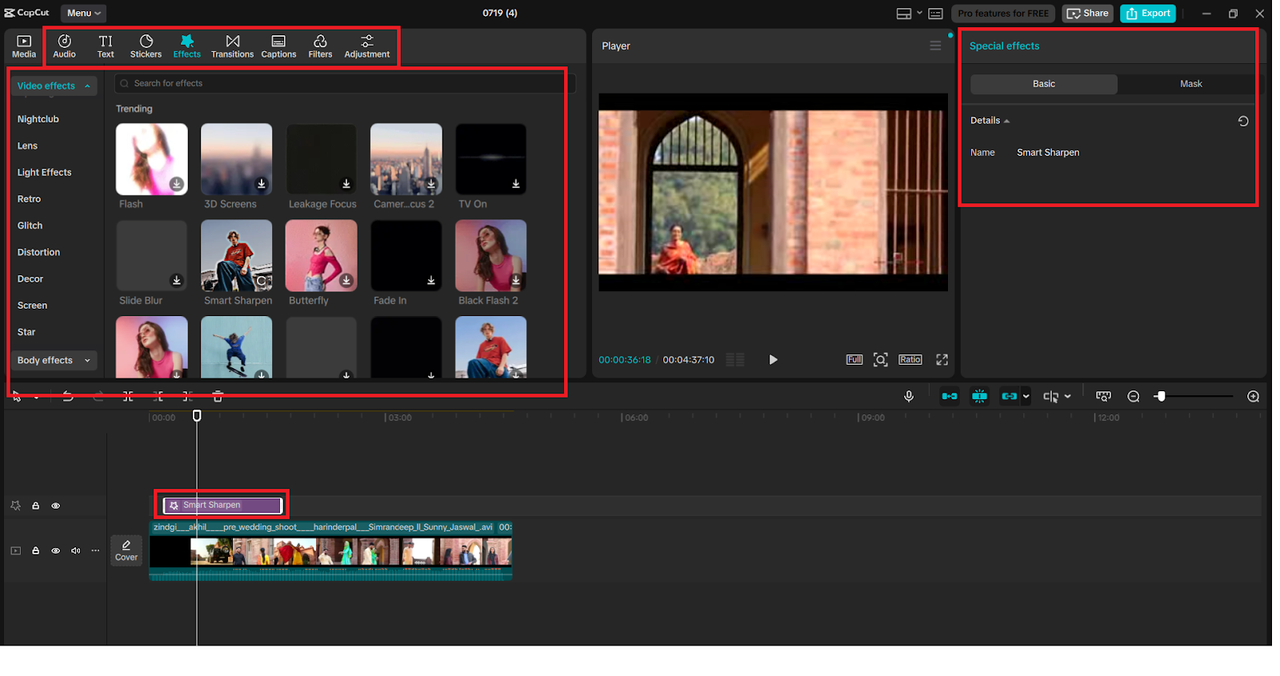
Step 3: Apply Enhanced Image for Upscaling
Having the clip at the ready, find the button called “Enhance quality” on the right-side toolbar. Clicking it, CapCut will automatically calculate and proceed with AI-enhanced filters, including sharpening and denoising.
No single button is labeled as AI Upscaler, though the latter works as part of “Enhance quality”, particularly in case your clip is of low quality. This creates a more detailed, crisper result, which is ideal for providing your footage with a polishing HD effect.
Here, you can add anything, including an AI-made overlay or voiceover with the CapCuts AI video upscaler and other AI tools.

Step 4: Apply Additional Edits
Your clip is already enhanced; now you may enhance it additionally with some filters, transitions, or adjustments. In case you would like to adjust the brightness, contrast, or color temperature, go to the panel of “Effects” or “Adjustment”. These adjustments may be able to supplement AI improvement by making the displayed output visually more unified.
Step 5: Export to High Quality
Then you can click on the “Export” button on the upper right side when you are done. Then select a higher resolution (1080p or 4K) and choose MP4 format, which is the output dependent on your requirements. AI processing will help CapCut improve quality.

Benefits of CapCut Desktop Video Editor
The desktop version of CapCut has more capabilities than AI upscaling. The following are some of the advantages:
- Intuitive Interface: Drag and drop editing and well-outlined panels.
- AI Tool Integration: It contains text-to-speech AI, an AI voice generator, a background remover, and auto-captioning.
- Pro-Level Effects: Webcam filtering, optical movement transitions, and sound effects provide a professional touch.
- Multilingual Voiceovers: This is helpful in the case of content creators who operate in various regions.
With all such functionalities, CapCut would emerge as an all-in-one solution to transforming simple videos into quality content.
When Should You Use AI Video Upscaler?
- The best time to use AI upscaling is when:
- You have an archived or on-the-go product.
- You should reuse the old clips with the new content.
- You add an overlay to the screen recordings or tutorials.
- You wish to introduce greater transparency to platform-ready delivery (YouTube, TikTok, etc.).
To all these, the enhanced image feature of CapCut can end up saving you time and energy, and still deliver in a professional manner.
Add Voiceovers with Text-to-Speech AI
As soon as you have improved your visuals, animate them with voice narration. The CapCut text to speech AI allows you to turn written scripts into incredibly natural voiceovers, perfect to use in a tutorial, commentary, or in historical documentary.
Simply press on the “Text” tab, click on “Text to speech”, select a voice, and your script will be converted immediately. You can match it with your upscaled video to have a finished product.
Final Thoughts
One of the best and quickest methods to make your footage look sharper is with the help of the AI video upscaler in CapCut. Then add its text-to-speech AI and AI voice generator, and you have the full multimodal toolkit of modern, scalable video making.
Are you ready to make your old clips HD? It has all that you need in a single interface with CapCut Desktop.